Sunday, November 15, 2015

MythTV on the New Apple TV

For years I have wished there was an App Store for the Apple TV. Like most people, I looked forward to things like games or streaming video content beyond the limited offerings bundled with previous version of the Apple TV. I also wanted something else: a MythTV Frontend.

MythTV is an open source project that helps you build your own digital video recorder (DVR). MythTV has a client/server architecture, called Frontend/Backend respectively. Ideally the Backend lives in a wiring closet or server room. A Frontend is attached to each television and plays content stored on the backend.

A MythTV Backend is fairly easy to set up with PC or Mac hardware and a networked television tuner such as HDHomeRun. A MythTV Frontend is more challenging to set up. It usually involves finding hardware that supports video decoding and has proper Linux support. You also need an IR receiver and a remote. Configuring the IR commands can be challenging. I used to tell people that MythTV is more of a hobby than a solution.

That all changed with the new Apple TV.

I received my Apple TV developer kit about six weeks prior to the launch of the New Apple TV. I immediately began building a MythTV application for tvOS. The MythTV Backend has a REST API that provides a great way to access content and data. Things went pretty smoothly and the MythTV app for tvOS was in the App Store on launch day.

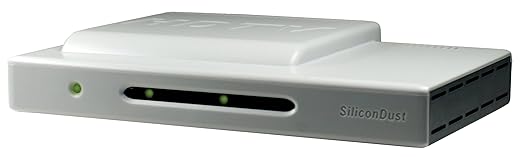
Thanks to the New Apple TV and the MythTV app for tvOS, it is now much easier to set up a MythTV system. For the backend you can use MythBuntu, a special build of Ubuntu that has MythTV baked in. Or you can set up a MythTV Backend on a Mac using these instructions. They may seem a bit daunting, but are mostly just commands you can cut and paste into Terminal. You'll also need a HDHomeRun. You don't need one of the new models. Mine is a dual tuner unit that is about 10 years old, pictured above. The older models can be found on eBay for around $50. For the Frontend, just use buy a new Apple TV and install the MythTV app. Now you have a TiVo-like DVR system and you can watch your recordings from any TV in your house.


The MythTV app for tvOS currently has the following features:
  • Recorded programs are listed and multiple episodes of the same show are grouped together. 
  • Top Shelf integration: quickly find and launch a show from the Apple TV home screen.
  • Scrubbing with snapshot thumbnails.
  • Fast-forward supports several speeds.
  • Watch content more quickly with 1.3x fast-forward (good for things like talk shows).
  • Easily skip commercials with 30-second jump forward and 8-second jump back.
  • Pick up where you left off. Playback progress is stored and synced across all your Apple TVs.
  • Delete shows when you are done watching them.
One feature that is not yet ready is the Program Guide. Until this is done you can use MythWeb, a web interface that runs on the MythTV Backend. It allows you to browse listing and manage schedules and recording rules. This works out pretty well because once schedules are set up (TiVo calls them "season passes"), the Backend pretty much runs on autopilot and doesn't need much maintenance.

As more content becomes available from streaming sources, "cutting the cable" becomes more attractive. One of the remaining barriers is recording and "time-shifting" local broadcasts. MythTV and the MythTV app for Apple TV fill this gap.

Apple TV apps can't be viewed in a web browser, but you can see screenshots below.


Thursday, June 11, 2015

Guard is Good (Swift)

Several good fixes and improvements to Swift were introduced at WWDC15 as a part of Swift2 -- the first major update to the excellent Swift programming language. One of these updates was the new `guard` keyword. It immediately resonated with me because I saw that it fixed some pain points that I have often encountered.

Pyramid of Doom


Anyone who has used Swift is familiar with the `if let` construct. It is an elegant way to unwrap an Optional, and do something with the unwrapped value if it is not nil. This leads to code that looks like this:

    func personFromData(data:NSData?) -> Person? {
        if let data = data {
            let json = JSON(data:data) // SwiftyJSON
            if let firstName = json["firstName"].string {
                if let lastName = json["lastName"].string {
                    return Person(firstName:firstName, lastName:lastName)
                }
            }

        }
        return nil
    }

Even in this small example, you can what has been referred to as the Pyramid of Doom.

Swift 1.2, released earlier this year, added support for unwrapping multiple Optional values at once with `if let`. This looks a bit better:

    func personFromData(data:NSData?) -> Person? {
        if let data = data {
            let json = JSON(data:data)
            if let firstName = json["firstName"].string
                   lastName = json["lastName"].string 
            {
                return Person(firstName:firstName, lastName:lastName)
            }
        }
        return nil
    }

Note that we couldn't completely collapse the pyramid because we have to convert the NSData to a JSON object, and you can't throw that statement in with the other assignments that are unwrapping Optionals. 

One problem with the examples so far is that there is no error handling. While it's nice to unwrap multiple Optionals at once, sometimes you might need unique error handling for each nil Optional. That means we're back to the Pyramid of Doom, except it's even worse now:
        
    func personFromData(data:NSData?) -> Result<Person, String> {
        if let data = data {
            let json = JSON(data:data)
            if let firstName = json["firstName"].string {
                if let lastName = json["lastName"].string {
                    return Result(value:Person(firstName:firstName, lastName:lastName))
                }
                else {
                    return Result(error:"missing lastName in JSON")
                }
            }
            else {
                return Result(error:"missing firstName in JSON")
            }
        }
        else {
            return Result(error:"where data was nil")
        }
    }

This is really ugly. Even in the small example above you can see that it's hard to associate the error handling code in each else clause with the corresponding `if let` that failed because of a nil Optional. The error handling code for each error condition is in the reverse order of the code that checks for the error conditions. 

Guard all the Things


Guards are kind of like `if let`, but inverted. Instead of using `if let` to unwrap an Optional while testing for nil, use `guard let ... else` to unwrap the Optional. If the Optional is nil, the else clause is executed. You have to return from the else clause. Our example can now be rewritten like this: 


    func personFromData(data:NSData?) -> Result<Person, String {
        guard let theData = data else {
            return Result(error:"data was nil")
        }
        let json = JSON(data:theData)

        guard let firstName = json["firstName"].string else {

            return Result(error:"missing firstName in JSON")
        }
        guard let lastName = json["lastName"].string else {
            return Result(error:"missing lastName in JSON")
        }
        return Result(value:Person(firstName:firstName, lastName:lastName))
    }

This is much better. Observe that the code to deal with errors is next to the error condition that was tested. Also, once all of the error checking is out of the way, the code that continues on for the no-error situation is no longer indented several levels deep. 

Guards can be used to check any condition -- they aren't just tied to Optional unwrapping. For example: 

        guard index <= 3 else {
            return Result(error:"Index out of bounds")
        }

This is not drastically different from what could be done before, however, the nuance is interesting. The alternative looks like this: 

        if index > 3 {
            return Result(error:"Index out of bounds")
        }

The version using `guard` reads better because the expression indicates the success state. It reads more like an assertion. Also, with guard the compiler requires a return in the error clause. A common programming mistake is to log something about the error but forget to return, allowing program execution to continue as though there was not an error. 

Naming Things


In the first code examples above, we used the common convention 
    if let data = data {

With `guard let,` we can no longer do this because the new constant isn't constrained within a new scope. We have to use a different name for the Optional and non-Optional versions of a variable or constant. Naming things is hard, but the benefits of using `guard` are worth it. 

Swift continues to evolve and become even more powerful and enjoyable to use. 


Thursday, January 29, 2015

(ab)Using APNS for Fun and For Profit

When we started building an event sharing social network, we didn't initially realize we were building a chat/instant messenger application. Once we added the ability to have a discussion around an event, we needed the ability to "live-update" the discussion if someone added a comment while you were in the discussion view (think iMessage). We didn't have a web socket or long-poll infrastructure in place at the time, but needed to get something working quickly.

We discovered we could use push notifications to accomplish this functionality. The challenge was to send a push notification that the app could intercept and react to if the app was in the foreground, but if the app was not in the foreground, iOS needed to ignore the push notification (no banner, sound, or badge update). This was before iOS 7 was released, so there was no official support for "silent" push notifications. We discovered we could send a push notification with an empty alert dictionary. Such a push notification didn't produce a banner if the app was not in the foreground.
{ aps: { alert: {} }, ...} 

This tactic continues to work with iOS 7 and iOS 8, and seems to get around Apple rate-limiting. The notifications are always delivered immediately. I suspect this is due to the alert in the push payload. The server doesn't think it is a silent notification, and therefore doesn't rate-limit the notifications. However, since the alert dictionary is empty, there are no visible or audible artifacts when the iOS device receives the push notifications.

Once iOS 7 was available, we used the new content-available setting to solve another problem. All of our logic to determine an accurate home screen icon badge count was in the client-side code. Because of this, the server could not send a badge value in the push notifications. iOS 7 allowed us to pass
content-available:1
which would wake up our app in the background to retrieve events from the server and calculate the badge count. We have some evidence that this does not work reliably. If the device is not charging, the push notification is received but sometimes the app does not get awakened and iOS logs an error:
“Silent Push: Deny app no resources reason: Insufficient power budget 0”

To sum up, even though it appears we can get around the rate limiting with an empty alert dictionary, iOS does not reliably wake the app to do a background fetch.